
It’s never been easier to interview someone across the world for a podcast, and my favorite free tool to do this is Zoom. You’ve used Zoom before for family happy hours, but did you know it can be an effective podcast interview platform as well? In this post, I’ll take you through how to record a high-quality podcast episode thanks to Zoom, from the setup stage to saving your recorded files:
Account Setup: How do you set up Zoom to record podcast interviews?
The first thing you’ll want to do is sign up here. It’s free, and the free account allows you to interview another person at an unlimited time length (though you’ll probably want to wrap up the interview at some point). In most cases, this is all you’ll need. This free account lets you interview 2 or more other parties at the same time as well, but there’s a 40-minute time limit at which the meeting will end. If you’re often interviewing multiple parties or interviewing someone along with a co-host in a separate location, you may want to upgrade to a Zoom Pro account with unlimited group meetings for $149.90/year.
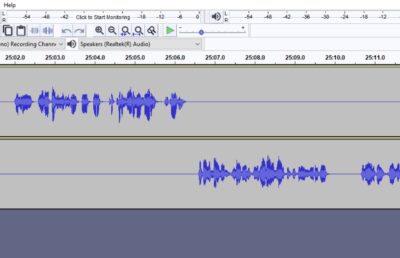
Once your account is set up, there’s a key setting you’ll want to check right away. Under “Settings,” then “Recording,” make sure you’re set up for Local Recording – not Cloud Recording. Local Recording allows you to record your interviews using separate audio tracks, which helps out when it comes to editing and bodes for a much cleaner final episode. Think about it – if a loud truck drives by your home when your guest is talking, don’t you want to be able to edit out that loud truck for the sake of your listeners?

Scheduling: How do you schedule podcast interviews in Zoom?
There are a few different ways to schedule meetings aka podcast interviews in Zoom. The most efficient way is to use a scheduling tool, so your guest can pick the best time that works for them. My favorite scheduler is Calendly, which is free for 14 days and then $8/month for a Premium account. Calendly allows you to integrate your Zoom account, making it easy for your guest to schedule a Zoom interview with you directly in the scheduler.
Another way is to schedule a meeting directly on the Zoom website. If you’re signed in, click “Schedule a Meeting” in the upper right to do so. Once the meeting is scheduled, make sure to add it to your preferred calendar and share it with your guest, along with the password.
Finally, if you’re in a pinch, you can start a Zoom meeting whenever you want when logged in to Zoom. Click “Host a Meeting” in the upper right, with Video Off or Video On. Once you’re in and ready, you can share the meeting invite link with your guest over email. This requires your guest being ready to watch out for your email when it’s go time. To do this, hit “Participants” once you’re in your Zoom meeting, then “Invite” in the side panel that opens up.

Pre-Interview: What do you do Pre-Interview in Zoom?
Once you join your scheduled meeting, there are a few things you’ll want to knock out before you hit record. First, test your speaker and microphone. Zoom gives you a great reminder to do this before you even officially start your meeting, and you can select the options available to make sure your headphones and microphone are connected the way they should be. It’s best practice to have your desired headphones and microphone plugged in, turned on, and ready to go before you even join your Zoom meeting. If all sounds good, hit “Join with Computer Audio.”

Once your guest is on and you can hear each other, there are a few settings you’ll want to check in “Audio Settings” by clicking the little arrow next to the “Mute” mic icon in the lower left, then going to “Audio Settings”:
- Under “Microphone,” uncheck the “Automatically adjust volume” box. It sounds funny, but Zoom overcompensates with this feature and if turned on it will literally make you sound funny. Make sure your guest does this, too.
- When you’re still in Settings, click “Recording” on the left panel and make sure this box is checked: “Choose a location for recorded files when the meeting ends.”
- Right below that, make sure this box is checked as well, as mentioned above: “Record a separate audio file for each participant who speaks.”

Those are the only settings you really need to check in your Zoom meeting before you hit record. You’ll also want to rock your short and sweet pre-interview chat overall. This means a quick icebreaker with your guest (try to make them laugh), making sure your headphones and mics are correct, confirming how much time they have, silencing your phones and closing other windows and email, and bringing up anything specific you need their input on or want to call out about the interview before you get started. This is also a great time to take a quick behind-the-scenes pic if you’d like (you can flip video on and off). Most importantly, ask the guest how to pronounce their full name if you’re not sure.

Recording: How do you record a podcast interview using Zoom?
Now for the fun part: hit that “Record” button! For the sake of your time and frustration, please make sure you do this. You’d be surprised how many podcasters have horror stories of that unbelievable, life-changing interview-that-never-was thanks to never hitting Record. You and your guest will know you’re recording if you see the blinking red dot that says “Recording…” in the upper left.

Then, do your thing! Put on your podcast host hat (figuratively, or maybe not), rock the interview, ask thought-provoking questions, let your guest be the hero, and have fun. And remember, you can always edit out any major slip-ups after you’re done, so keep it casual and fun. Once you’re done with the interview, hit “Stop Recording” in the lower right, which might be under “More” depending on the size of your window.
Saving: How do you save a podcast interview in Zoom?
You’re done with your interview! Phew, what a rush! Now let’s make sure that baby gets saved properly. Extend your thank yous and give your guest a ballpark idea of when the final podcast episode will be released. Then, hit “End” in the lower right, “End Meeting for All,” and wait for the meeting to convert. Have found this is also an excellent time to take a minute for that much-needed bathroom stop. Finally, create a folder where you want your interview files to go, and BAM! You just successfully recorded and saved a podcast interview using Zoom. Your separate audio tracks will be in the “Audio Record” subfolder within the folder you just created.
Summary: How do you record a podcast interview using Zoom?
That’s it! I hope you found this guide helpful for recording a podcast interview using Zoom. It’s an awesome tool, and pretty intuitive once you get the hang of it. Remember to set up your account, schedule your interview, rock your pre-interview chat, record the interview, and save it where you want it to go. Keep your files organized, stay efficient where you can, and always have fun.
If you have any questions on Zoom podcast interviews, podcasting, or podcast production, you can always reach me at . If you found this post helpful, you’ll also enjoy “The Top 10 Things I Learned in My First 100 Podcast Episodes” and any of the 100+ episodes of the Wild Business Growth Podcast. Thank you for your time. Pod on!
Related Posts

What Makes Great Podcast Artwork?
How Do You Edit Your Podcast in Audacity?

Why Should You Practice Recording Into Your Podcast Mic?
5 Comments
Comments are closed.
[…] can record a podcast interview over Zoom with video off. This allows you […]
[…] [20:23] How do you record podcast interviews using Zoom […]
[…] [46:53] Zoom Interviews […]
[…] Download the FFmpeg Plugin – This allows you to import and export a wider range of file types, including M4A – which you’ll need if you record any podcast interviews using Zoom. […]
[…] Okay, it’s always a little awkward when you connect with your podcast guest for the first (or second) time. One of your jobs as podcast host is to break the ice ASAP. That could mean a dad joke, a compliment based on something cool you saw your guest just did, or a random thing you have in common. I’ve found laughs always get your guest in gear best, so let any bit of corniness and goofiness you have shine. What better way to pregame an interview than with laughing, smiling faces?! Break the ice and have some fun before you even hit record. […]